Boxers - Godot Versus Unity

Unleashing the Best of Game Development: Godot or Unity?

Are you an indie game developer who loves making awesome games? If so, you’ve come to the right place! Today, we’re going to compare two amazing game engines: Godot and Unity. As a gamer who loves working with Godot, I’ll give you the inside scoop on why Godot might be the perfect choice for you. So let’s dive in and explore these two powerful game-making tools!

First, let’s talk about performance. Both Godot and Unity can help you create fast and smooth games, but Godot has some cool tricks up its sleeve. Godot is super lightweight, which means your games will run really fast, even on older computers. On the other hand, Unity can sometimes be a bit heavy, making it tougher for your games to run quickly on some devices. So when it comes to performance, Godot has an edge.

Now let’s move on to features. Both Godot and Unity are packed with awesome tools to help you make the best games possible. Unity has been around longer, so it has more built-in features, but Godot is catching up fast! One great thing about Godot is that it’s an open-source engine. This means that developers from all over the world are always working to make it better and add new features. Plus, if there’s something you want that isn’t in Godot yet, you can always create it yourself or ask the friendly Godot community for help.

Ease of use is another important factor when choosing a game engine. For beginners, Godot’s simple and clean interface makes it easy to learn and start creating games right away. Unity also has a user-friendly interface, but it can sometimes feel a bit cluttered with all its features. Godot’s built-in scripting language, GDScript, is similar to Python, which is known for being easy to learn and use. Unity uses C#, which is a great language, but it can be a little harder to learn for beginners.

So, why is Godot a better choice for indie developers? Well, one big reason is the cost. Godot is completely free, while Unity can get expensive if you start making money from your games. Indie developers often have tight budgets, so saving money is always a good thing. Plus, with Godot being open-source, you’ll have access to a community of developers who are always happy to help and share their knowledge.

In conclusion, both Godot and Unity are powerful game engines that can help you create amazing games. However, Godot has some advantages that make it a better choice for indie developers. With its lightweight design, open-source community, and easy-to-learn interface, Godot is perfect for indie game developers who want to create incredible games without breaking the bank. So, if you’re an indie developer looking for a game engine to start your next project, give Godot a try! You might just find that it’s the perfect fit for your needs. Happy game-making!

Photo by cottonbro studio: https://www.pexels.com/photo/man-in-black-boxing-gloves-4761658/

Unlock Your Godot Potential: 10 Game-Changing Tips and Tricks You Need to Know

Hey there, fellow gamers and game devs! If you’re anything like me, you love making games almost as much as you love playing them. That’s why I’m super excited to share 10 amazing tips and tricks that will make your Godot game development journey even more exciting and efficient. Let’s dive right in!

Use Godot’s Built-in Templates

Did you know that Godot has a bunch of cool templates you can use to start your game? Just open the “Project Manager,” click “Templates,” and you’ll find tons of examples that can kick-start your project. It’s like a treasure trove of game-making goodness!

Master the Scene Dock

The scene dock is where all the magic happens. You can create, organize, and manage your game objects, called “nodes,” here. Right-click on any node to access a handy menu with options like duplicating, making a scene instance, or even deleting it. It’s like a superpower for organizing your game!

Harness the Power of Groups

    Groups are an awesome way to keep track of similar nodes in your game. Just select a node, go to the “Node” tab, click “Groups,” and add it to a new or existing group. Now you can easily find and work with all nodes in the group, saving you tons of time!

    Customize Your Workspace

    Feeling cramped in your Godot workspace? No problem! You can customize it to make it just right for you. Go to “Editor” > “Editor Settings” and explore the options to change the theme, tweak the layout, or even change the font size. Make it your own personal game-making paradise!

    Use Grid Snapping for Precision

    Want to place nodes perfectly in your game? Just turn on “Grid Snap” at the top of the editor, and your nodes will snap to an invisible grid. You can even change the grid size in the “Snap” menu. It’s like having a superpower for precise node placement!

    Learn Keyboard Shortcuts

      Who needs a mouse when you have keyboard shortcuts? Godot has a ton of them that can speed up your workflow. For example, press “Ctrl + S” to save your work, “Ctrl + D” to duplicate a node, and “F5” to run your game. Memorize your favourites and become a Godot ninja!

      Debug with the Debugger

      Sometimes, even the best game developers run into bugs. But fear not! Godot has a powerful debugger to help you squash those pesky problems. Just click the “Debugger” tab at the bottom of the editor and start hunting down those bugs. It’s like a detective game within your game-making adventure!

      Use the Asset Library

      Need some extra assets for your game? Godot’s got you covered! Check out the “Asset Library” under the “Project” menu. You’ll find a treasure trove of free resources like scripts, textures, and even whole game templates. It’s like a magical toolbox for game makers!

      Save Time with Animation Shortcuts

      Animations can bring your game to life, and Godot makes it easy with a few handy shortcuts. In the Animation tab, you can press “Ctrl + Click” on the timeline to create a new keyframe, or “Shift + Click” to delete one. It’s like a secret dance move for your game characters!

      Explore Godot’s Tutorials and Documentation

      Last but not least, never stop learning! Godot’s official website has loads of tutorials and documentation to help you become a game-making master. Plus, the Godot community is super friendly and always ready to help. So, dive into the forums, join Discord channels, and chat with other Godot enthusiasts. You’ll learn new tips, tricks, and techniques that will take your game development skills to the next level!

      That’s it! These 10 game-changing tips and tricks will help you unlock the full potential of Godot and make your game development journey even more exciting. Remember, practice makes perfect, so keep experimenting, have fun, and never stop learning. With Godot by your side, you’ll be creating amazing games in no time. Now, let’s get back to making our gaming dreams come true!

      How to Make Your Game Scale for All Resolutions in Godot 4.0

      How to Make Your Game Scale for All Resolutions in Godot 4.0

      Making your game scale for all resolutions in Godot is an important step in creating a game that is accessible and enjoyable for everyone. Fortunately, Godot provides a really simple way to achieve this through the Project Settings.

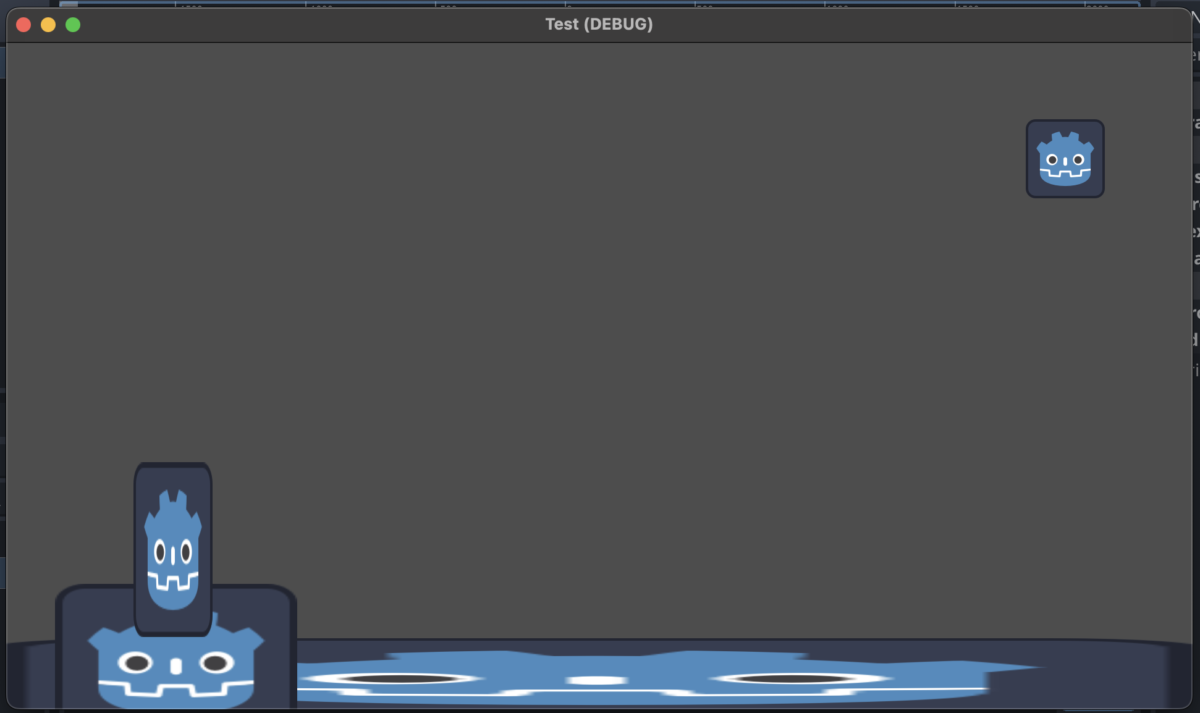
      If you make a game that looks like this…

      Simplistic Game Setup

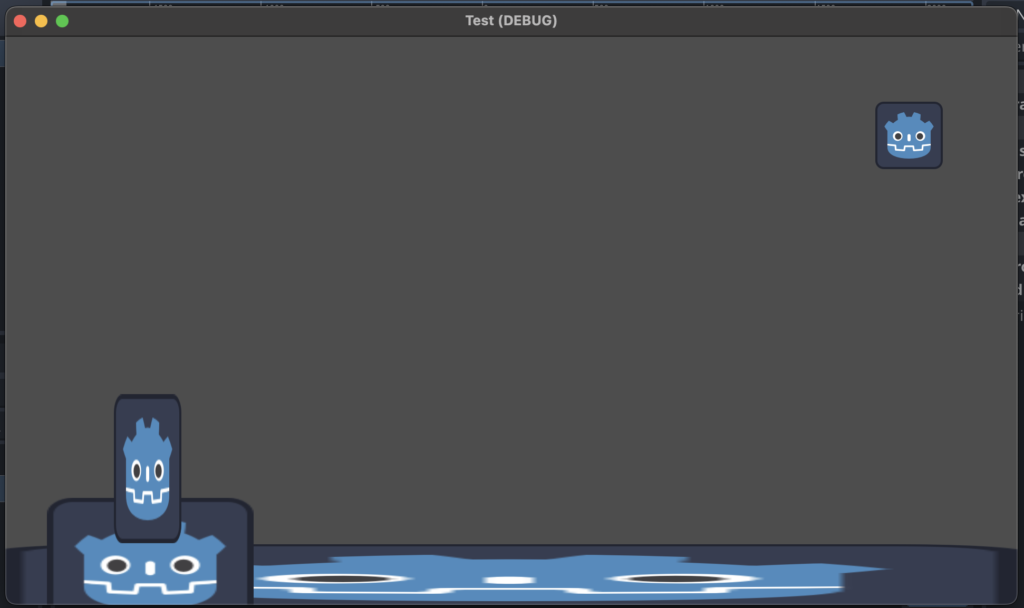
      But when you stretch it it looks like this…

      Simplistic Game Setup, Stretching did not scale assets

      Then this tutorial is for you!

      Stretch Mode is a setting in Godot that determines how your game will scale to fit different screen resolutions. There are several different stretch modes to choose from, but for the purpose of this article, we will focus on the “Viewport” stretch mode.

      First, open your Godot project and click on “Project” in the top menu bar. From there, select “Project Settings” and then click on the “Display” tab. Under the “Window” section, you will see the “Stretch” section. Click on the drop-down menu next next to “Mode” and select “Viewport.”

      Now, your game will automatically scale to fit the resolution of any device it is played on. However, there are a few additional steps you can take to ensure that your game looks great at any resolution.

      One important thing to keep in mind is your game’s aspect ratio. Aspect ratio refers to the proportional relationship between the width and height of your game’s display. For example, a common aspect ratio for mobile devices is 16:9, which means that the width of the screen is 16 units for every 9 units of height. Keeping the option for “Aspect” set to keep ensure that the aspect ratio of your game does not change. It accomplishes this using black bars to fill out the space in the window.

      To set your game’s aspect ratio, go back to the Project Settings window and select the “Display” tab. Under the “Window” section, you will see the Viewport Width and Viewport Height. Setting these values allows you to specify an aspect ratio that will be held.

      Finally, you may want to consider creating different versions of your game’s graphics for different resolutions. This can help ensure that your game looks great at any size. For example, you may want to create high-resolution graphics for larger screens and lower-resolution graphics for smaller screens.

      With these steps, you can make your game scale for all resolutions in Godot. By using the Stretch Mode and setting your game’s aspect ratio, you can create a game that looks great on any device.